
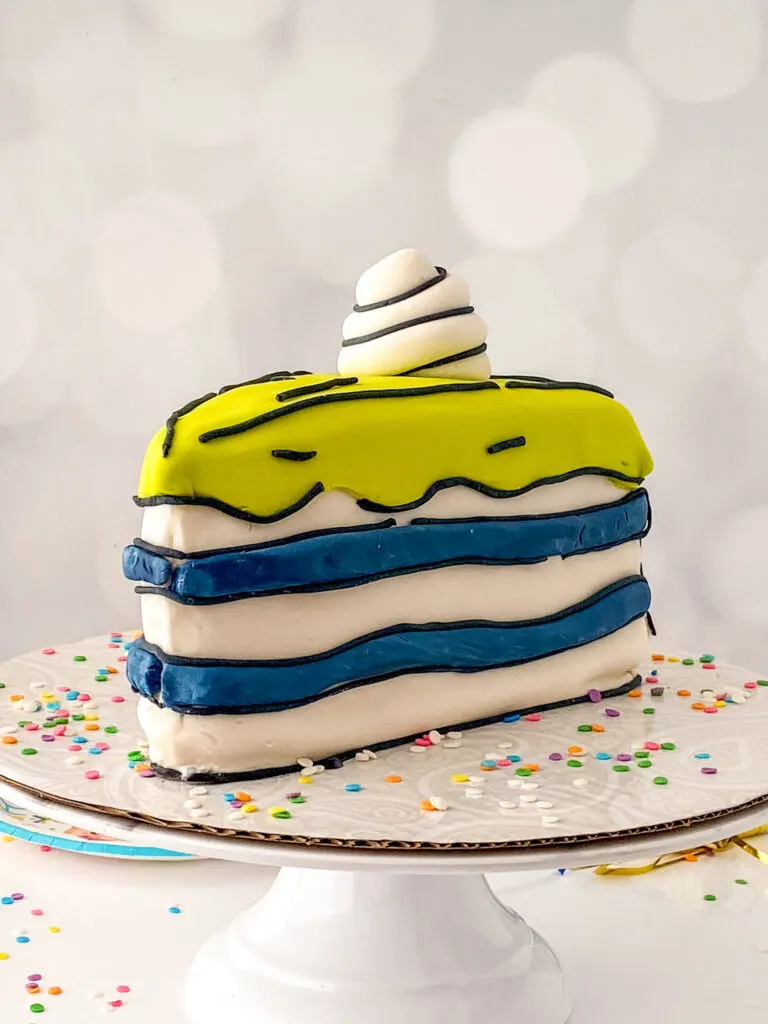
If you’re looking for a unique birthday cake, look no further than this Cartoon Cake. Inspired by the viral Tigga Mac cartoon cake, this cake is sure to turn heads and be the highlight of any party.


This Cartoon Cake is one of the coolest, retro looking cakes that look like something out of a comic book or ’90s cartoon.
While I wouldn’t say this is necessarily easy to make, I would say it’s worth making.
If you have any baking skills at all, I am sure you are able to make this cake. It just requires a bit of time and patience but the outcome is so cool!

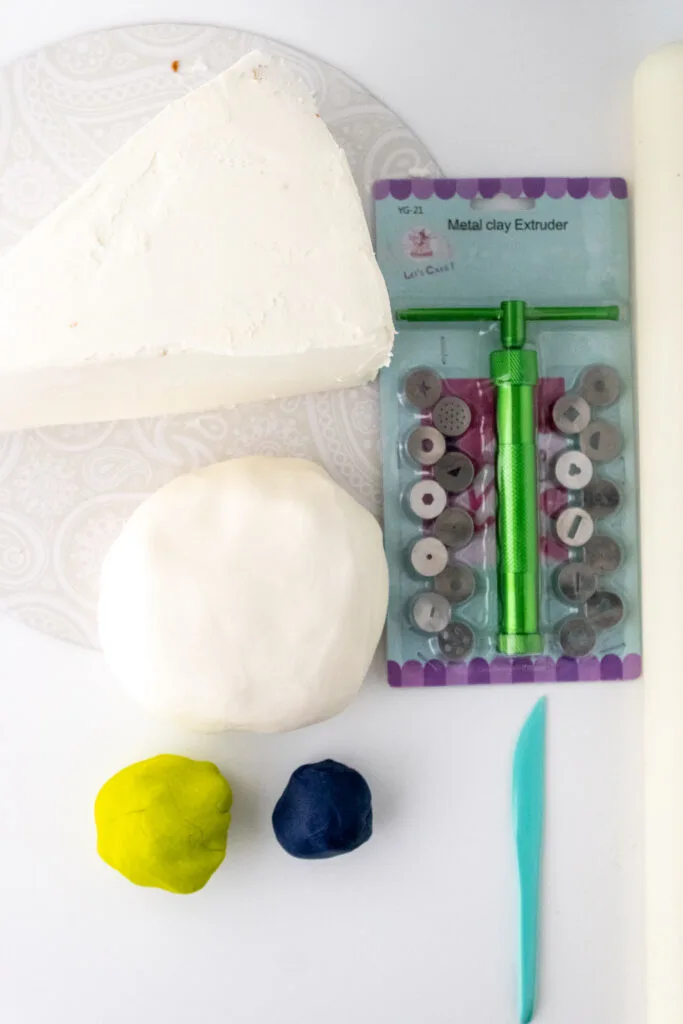
Cartoon Cake Ingredients
- ¼ Sheet Cake (single-layer)
- Buttercream
- White Fondant
- Green Fondant
- Navy Blue Fondant
- Black Fondant
- Small cup of water
- Powdered sugar
Equipment needed
- Serrated Knife
- 12-inch piping bag
- 12–inch Cake Board
- Clay Extruder (only used for fondant)
- Rolling Pin
- Offset Spatula
- Scissors
- X-acto Knife
- Paint Brush
- Ruler, optional

Things to Note
- It’s easier to work with frozen cake when stacking the layers and adding buttercream, it reduces crumbs and the cake won’t break.
- If you accidentally cut the cake too narrow or too wide and need to adjust it, you can use buttercream to build up any imperfections. Freeze between applications.
- Keep the fondant covered in Ziploc bags when not in use, this keeps it from drying out.
- If an air bubble appears in your fondant after kneading it, use a small stick pin or push pin to release the air pocket and rub it gently with your finger
- Water should hold the fondant pieces on, however, if it doesn’t, you can create “glue” by taking a tiny bit of white fondant and mixing it with a little water until a small paste forms.
- If you have Tylose powder on hand – mix 1 tsp with 1 tsp water and it is the BEST form of sticking fondant to fondant.

Frequently Asked Questions
Who is Tigga Mac?
Tigga Mac also known as Tigga MacCormack is a baker and co-owner of Cake for Days, who went viral for joining the trend of making a ‘cartoon cake’, or a dessert that looks like something straight from a comic book. Her cake was so realistic looking, nobody believed it was really made of cake.
Can I use store-bought cake?
Absolutely! In fact, it would be way easier to make this if you just purchased a pre-made cake and asked them to just frost it in white frosting (but left everything else plain). If you’d rather, you can use your own homemade cake recipe.
Can I use homemade fondant?
Yes! You can certainly use homemade fondant. However, I do find it saves so much time and energy by using store-bought fondant.

How to Make a Cartoon Cake like Tigga Mac
Start by slicing 3 triangle shapes from the sheet cake. You will end up with 4 but only need 3, the 4 will leave the cake non-sturdy.
Next, add frosting to the layers and stack the 3 layers. Chill if necessary (see notes).
Frost the outside of the cake with a fluffy buttercream or ganache.
Smooth out the buttercream, correcting the shape of the cake with buttercream.

Fondant Instructions for Panelling the sides
Knead the fondant until it is soft like play-doh, there should be no cracks or creases, the fondant should be smooth.
Dust your work surface with powdered sugar.
Roll out the fondant to ¾ inch thickness (just enough to cover one side of the cake). Do not flip the fondant over to roll, only roll on that one side.
Lay the fondant against the cold/frozen cake.
Cut out the shape of side one with the X-acto knife.
Roll out more fondant and repeat for sides 2 and 3.

Lightly mist the icing or the fondant on the side being adhered to the cake.
Press gently onto the cake and adhere each of the sides to one another with a little bit of water.
Dust the surface again, knead and roll out the green fondant for the “icing” on top.
Roll it into a long triangle, and drape it over the top.
Lift up the overhang and add a small amount of water where you want the icing to hang over the sides.
Use a X-acto knife to carve the squiggle lines mimicking the appearance of a drip icing.

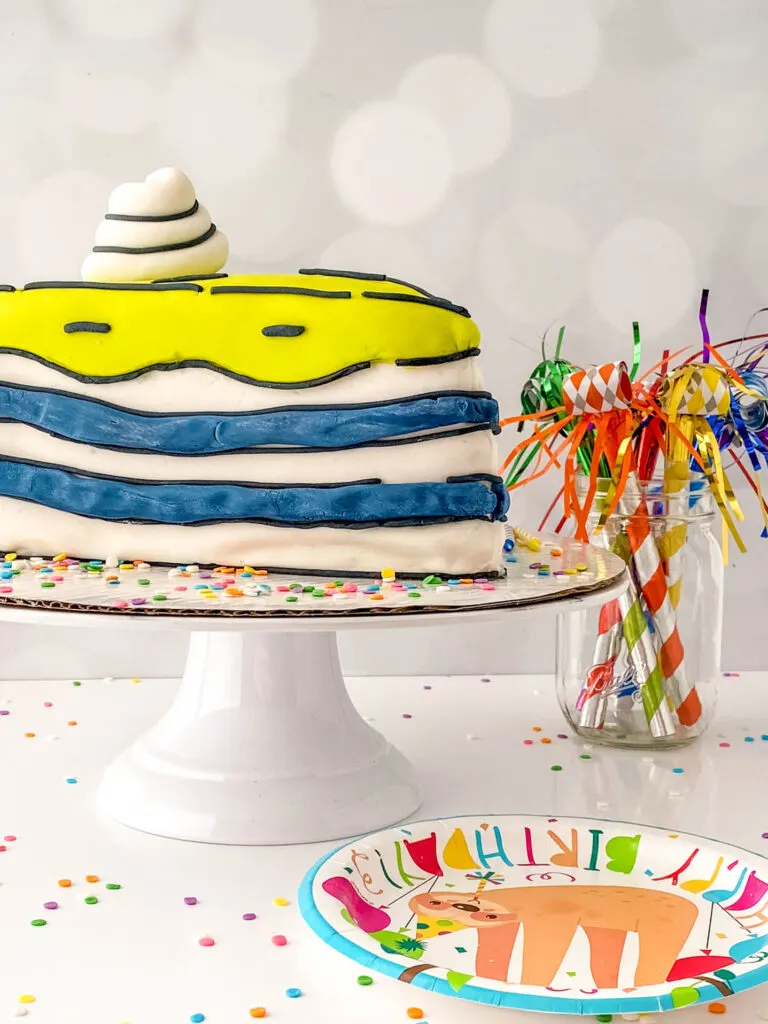
Roll the blue fondant into a log.
Press the log down with two fingers, the more imperfect the better for the “filling” in the slice of cake.
Adhere with a very small amount of water onto the blue fondant, it should be tacky, not wet.
Place on the side. (repeat twice per side)

Roll a thick, long log of white fondant for the “swirl of icing” on top of the cake.
Circle it around itself until you have the swirl, set aside.
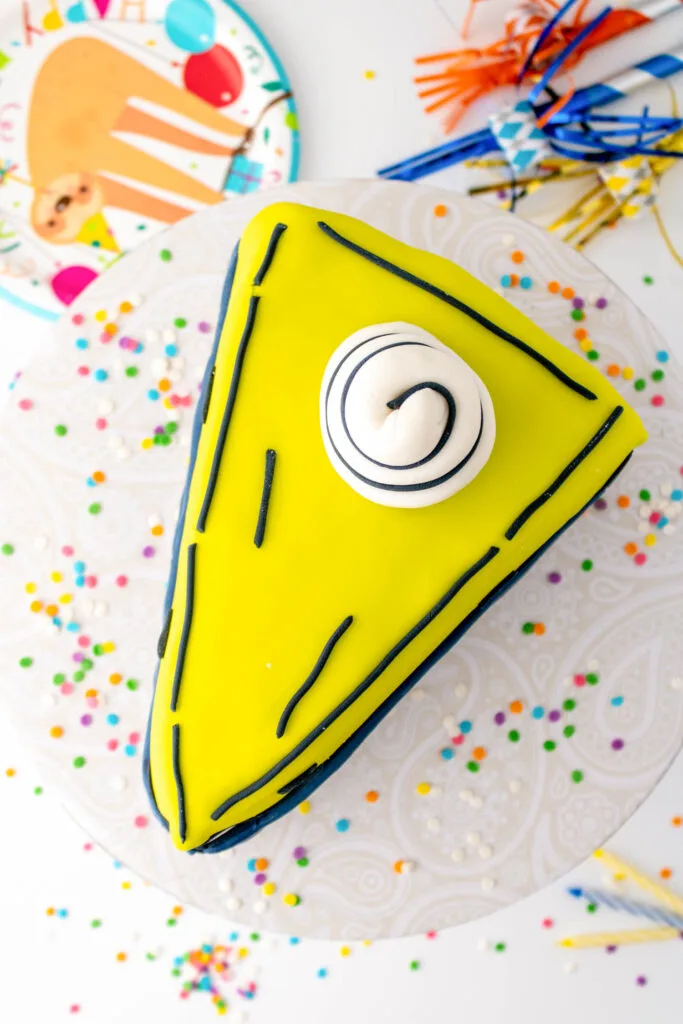
Outline in black
Add black fondant to the clay extruder, and use the small circle attachment (but not the smallest circle).
Outline your entire cake in the black fondant adhering with a tiny bit of water.
It’s best to apply it on the cake itself just get it tacky enough to stick.
If it breaks that’s super ok! It is supposed to look sketched! Broken black lines help make it look more like a cartoon.
Add additional embellishments if you’d like.

To clean up the cake:
You can use vodka or lemon juice to get any remaining powdered sugar off the fondant once the cake has dried. The alcohol content in both will have it evaporate and dry quickly while leaving the cake without any extra powdered sugar on it.
Serve and enjoy when ready!


Cartoon Cake
Ingredients
- ¼ Sheet Cake single-layer
- 4 Cups Buttercream
- 24 oz White Fondant
- 4.4 oz Green Fondant
- 4.4 oz Navy Blue Fondant
- 2 oz Black Fondant
- Small cup of water
- ¼ cup powdered sugar
Equipment
Instructions
- Start by slicing 3 triangle shapes from the sheet cake. You will end up with 4 but only need 3, the 4 will leave the cake non-sturdy.
- Next, add frosting to the layers and stack the 3 layers. Chill if necessary (see notes).
- Frost the outside of the cake with a fluffy buttercream or ganache.
- Smooth out the buttercream, correcting the shape of the cake with buttercream.
Fondant Instructions for Panelling the sides
- Knead the fondant until it is soft like play-doh, there should be no cracks or creases, the fondant should be smooth.
- Dust your work surface with powdered sugar.
- Roll out the fondant to ¾ inch thickness (just enough to cover one side of the cake). Do not flip the fondant over to roll, only roll on that one side.
- Lay the fondant against the cold/frozen cake.
- Cut out the shape of side one with the X-acto knife.
- Roll out more fondant and repeat for sides 2 and 3.
- Lightly mist the icing or the fondant on the side being adhered to the cake.
- Press gently onto the cake and adhere each of the sides to one another with a little bit of water.
- Dust the surface again, knead and roll out the green fondant for the “icing” on top.
- Roll it into a long triangle, and drape it over the top.
- Lift up the overhang and add a small amount of water where you want the icing to hang over the sides.
- Use a X-acto knife to carve the squiggle lines mimicking the appearance of a drip icing.
- Roll the blue fondant into a log.
- Press the log down with two fingers, the more imperfect the better for the “filling” in the slice of cake.
- Adhere with a very small amount of water onto the blue fondant, it should be tacky, not wet.
- Place on the side. (repeat twice per side)
- Roll a thick, long log of white fondant for the “swirl of icing” on top of the cake.
- Circle it around itself until you have the swirl, set aside.
Outline in black
- Add black fondant to the clay extruder, and use the small circle attachment (but not the smallest circle).
- Outline your entire cake in the black fondant adhering with a tiny bit of water.
- It’s best to apply it on the cake itself just get it tacky enough to stick.
- If it breaks that's super ok! It is supposed to look sketched! Broken black lines help make it look more like a cartoon.
- Add additional embellishments if you’d like.
To clean up the cake:
- You can use vodka or lemon juice to get any remaining powdered sugar off the fondant once the cake has dried. The alcohol content in both will have it evaporate and dry quickly while leaving the cake without any extra powdered sugar on it.
- Serve and enjoy when ready!